Garage Floor Coatings: A Complete Guide to Protection & Finish
Protect and upgrade your garage with the right floor coating. This in-depth guide compares popular options like epoxy and polyurethane, explains surface preparation and application steps, and breaks down DIY versus professional costs. Learn how to choose a durable, stain-resistant finish that simplifies cleaning and enhances your space.

Why invest in a garage floor coating?
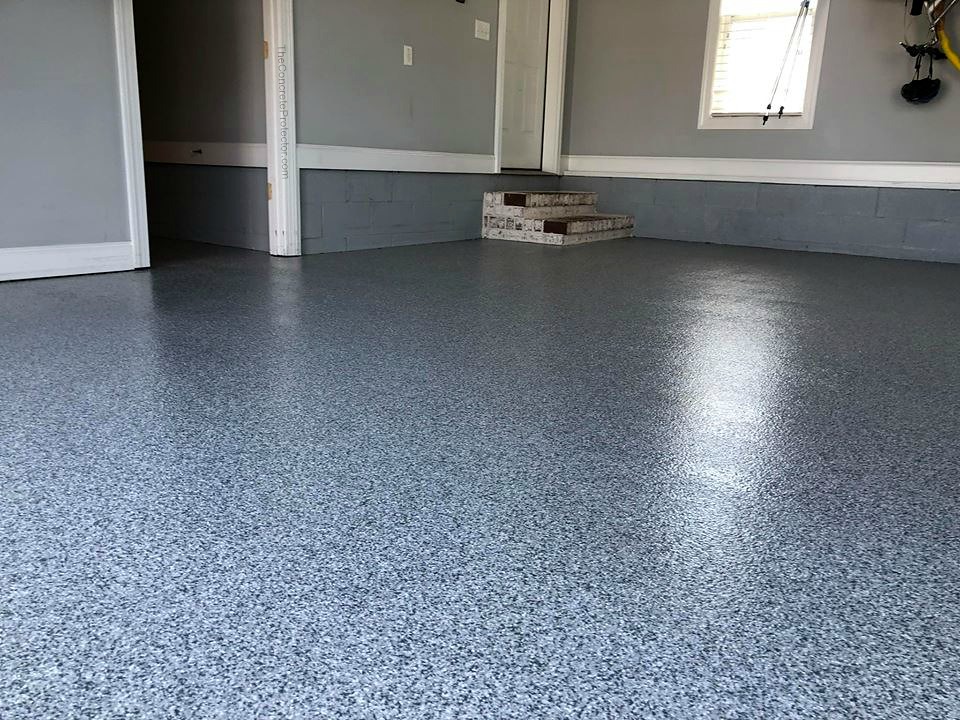
A durable floor coating can dramatically extend the lifespan and usefulness of concrete in a garage. Coatings shield the surface from oil, chemical spills, abrasion, and impact, preventing premature deterioration. Beyond protection, a finished floor elevates the room’s appearance, turning dull gray concrete into a clean, polished surface that’s easier to sweep, mop, and maintain. For homeowners looking to improve functionality, curb appeal, or resale value, a quality coating is a cost-effective upgrade.
Epoxy versus polyurethane: how they differ
Two materials dominate garage floor coatings: epoxy and polyurethane. Each has strengths that suit different priorities.
Epoxy
- Excellent bond to concrete, creating a hard, protective layer
- High resistance to many chemicals and stains
- Available in multiple colors and glossy finishes
- Can be formulated as a thicker, self-leveling product that helps hide small imperfections and fills minor voids
Polyurethane
- More flexible than epoxy, which helps prevent cracking and delamination
- Superior UV stability, so it resists yellowing under sunlight or garage door openings
- Generally applied in thinner layers, requiring less product
- Excellent abrasion resistance, making it good for heavy foot traffic and moving equipment
In many professional systems, epoxy serves as the base coat for adhesion and thickness, while polyurethane is used as a clear topcoat to add UV and abrasion protection. Choosing between the two depends on exposure to sunlight, expected wear, and the desired finish.
Preparing the concrete for a long-lasting finish
Surface preparation is the foundation of a successful coating. A poorly prepared slab will lead to peeling, bubbling, or uneven adhesion. Key steps include:
- Clean thoroughly to remove oil, grease, dirt, and previous coatings. Heavy stains may require degreasers or solvent cleaners.
- Repair cracks and spalls with concrete patching products so the surface is smooth and stable.
- Profile the slab by etching, shot blasting, or diamond grinding. Creating a roughened texture gives the coating something to grip, improving adhesion.
- Verify the slab is fully dry and within the recommended moisture limits for the chosen coating system.
Professional installers use specialized machinery and controlled techniques to ensure consistent profiling and moisture testing. This preparation often determines how long the coating will perform.
How coatings are applied
Application varies with the product, but the workflow is similar across most systems:
- Prime the floor if the manufacturer recommends a primer to enhance adhesion and seal the concrete.
- Mix components precisely according to instructions; improper ratios or mixing can ruin the cure.
- Broadcast decorative flakes or broadcast aggregate when applicable for aesthetics and traction.
- Spread the coating using rollers, squeegees, or trowels to achieve an even layer.
- Allow adequate cure time between coats; rush curing and foot or vehicle traffic can damage the finish.
- Apply a clear topcoat for additional protection, sheen control, and UV resistance if needed.
Non-slip additives can be integrated into the topcoat to improve safety. Follow temperature and humidity guidelines during application to ensure proper chemical reaction and adhesion.
Cost considerations and whether to DIY
Costs depend on the size of the garage, surface condition, product choice, and whether you hire a professional. DIY kits are available and can be economical for small projects if you have time and confidence in the prep work. However, professional installation typically delivers better long-term performance, especially for larger areas or heavily trafficked garages.
| Coating Type | DIY Cost (Materials Only) | Professional Installation |
|---|---|---|
| Epoxy | $200 - $700 per 250 sq ft | $3 - $12 per sq ft |
| Polyurethane | $250 - $900 per 250 sq ft | $4 - $15 per sq ft |
Prices, rates, or cost estimates mentioned in this article are based on the latest available information but may change over time. Independent research is advised before making financial decisions.
Final thoughts and choosing the right system
Selecting the proper floor coating means balancing durability, appearance, UV exposure, and budget. Epoxy is an excellent choice when you need a tough, chemical-resistant base with a glossy finish. Polyurethane brings flexibility and UV stability, making it ideal as a topcoat or for garages with sunlight exposure. For many installations, a combined epoxy primer/base and polyurethane clear coat delivers the best of both worlds.
If you plan a DIY approach, be prepared to invest time in meticulous cleaning and profiling; that work determines how long your coating will last. If you prefer a faster, more dependable result, professional installers offer experience, equipment, and warranty options that can justify the higher upfront cost.
A well-executed coating will protect your concrete, simplify maintenance, and transform the look of your garage. Assess your needs, compare product specifications, and consider a professional consultation to identify the system that best matches your expectations and budget.


