Garage Floor Coatings: Epoxy vs Polyaspartic Compared
Thinking about upgrading your garage floor? This in-depth comparison breaks down epoxy and polyaspartic coatings—durability, UV resistance, cure times, prep work, cost, and whether it’s a DIY weekend job or a pro install. Learn which coating fits your needs for a long-lasting, low-maintenance finish.

Garage Floor Coatings: Epoxy vs Polyaspartic Compared
Why epoxy is still a reliable option
Epoxy has long been favored for garage floors because it balances protection, versatility, and cost. When resin and hardener are combined, they form a tough, plastic-like surface that stands up to many typical garage stresses. Properly applied epoxy resists oil, gasoline, most household chemicals, abrasion from foot and vehicle traffic, and staining—making it a practical choice for everyday garages.
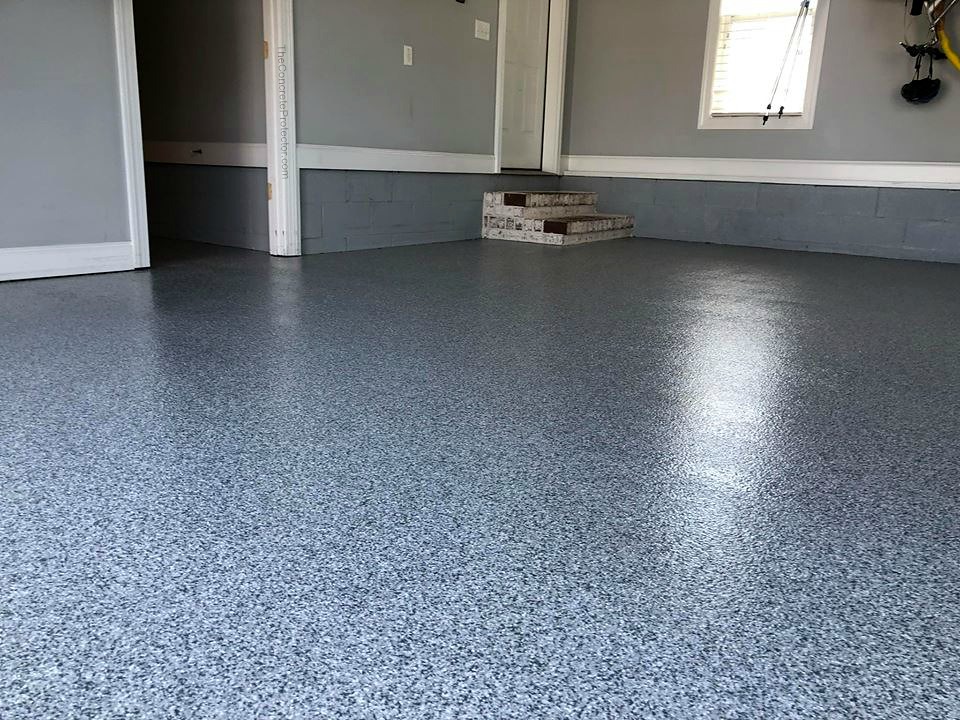
Homeowners also appreciate the aesthetic flexibility epoxy provides. It’s easy to customize with colored flakes, chips, or metallic pigments to produce anything from a straightforward solid coat to a multi-layer showroom-style finish. Many epoxy products are formulated with the home DIYer in mind: kit-style packaging, clear mixing instructions, and roll-on application options. That said, achieving a picture-perfect, bubble-free surface takes preparation and some experience.
What polyaspartic brings to the table
Polyaspartic coatings are a newer technology in the garage-floor market and offer several performance benefits. Their most notable advantage is speed—polyaspartic systems can cure so quickly that a floor can often be returned to foot traffic or even vehicle use within the same day. For homeowners who need minimal downtime or use their garage as a workshop, that rapid turnaround is a major benefit.
Polyaspartic chemistry also provides improved UV stability compared with standard epoxy. These coatings are far less prone to yellowing or fading when exposed to sunlight, which is especially important for garages with windows, open doors, or driveways that see direct sun. In many cases high-quality polyaspartics match or exceed epoxy in hardness and chemical resistance, and they typically retain flexibility across temperature swings—reducing the risk of cracking or delamination. The trade-off is cost: polyaspartic products and professional installs usually carry a higher price tag.
Preparing concrete for a durable finish
No matter which coating you choose, surface preparation is the single biggest determinant of long-term performance. Begin by thoroughly cleaning the slab—remove dirt, oil, grease, and other contaminants with degreasers, stiff brushes, and pressure washing as needed. Any existing coatings or heavy residue should be stripped or mechanically abraded so the new product bonds to clean concrete.
Repair visible damage before coating. Tiny hairline cracks can often be filled with epoxy-based fillers; larger voids or spalled areas may require patching compounds or localized concrete repair. After repairs, the surface is usually etched or diamond-ground to create the slight profile needed for good adhesion. Equally important is moisture control: confirm the slab is dry and within the manufacturer’s allowable moisture limits. High moisture can cause bubbling, poor adhesion, or premature failure.
Step-by-step application workflow
While formulations differ, the typical installation sequence for both epoxy and polyaspartic systems follows these stages:
- Prime the slab: Apply a primer/sealer to reduce porosity and promote adhesion.
- Mix accurately: Follow the product’s mixing ratios and pot-life instructions—timing matters.
- Apply the base coat: Use rollers or squeegees for a consistent, even layer.
- Broadcast decorative materials: If you want flakes or chips, broadcast them into the wet base coat to achieve texture and depth.
- Topcoat and protect: After the base cures, apply a clear topcoat to lock in decoration and add abrasion and chemical resistance.
With polyaspartic systems these steps are often compressed into a single day thanks to fast cure times. Epoxy usually requires longer waits between coats and a more extended cure period before heavy use.
Cost estimates and long-term value
Costs depend on garage size, slab condition, product quality, and whether you DIY or hire a pro. Typical ranges are shown below.
| Coating Type | DIY Cost (Materials) | Professional Installation |
|---|---|---|
| Epoxy | $200 - $500 | $1,000 - $3,000 |
| Polyaspartic | $400 - $800 | $2,000 - $4,000 |
Pricing disclaimer: Estimates are approximate and can vary by region, garage size, surface condition, and specific product choices. Obtain current quotes before budgeting.
When judging value, consider longevity and maintenance. A higher-quality, professionally installed coating can protect your concrete for many years with minimal upkeep, improving appearance and potentially boosting resale appeal. DIY installations can save money but require careful preparation and strict adherence to product instructions.
Choosing the right coating for your garage
If you want a budget-friendly option that’s widely available to DIYers and delivers solid protection for routine garage use, epoxy is a strong candidate. It provides good chemical and abrasion resistance and broad customization options.
If speed, UV stability, and long-term resilience in sun-exposed areas are top priorities—and you’re willing to invest more—polyaspartic is worth considering. It’s ideal for garages that need quick re-entry, have extensive sunlight exposure, or where temperature-related movement could be an issue.
Regardless of your choice, the keys to a lasting finish are the same: thorough surface prep, proper mixing and application, and following the manufacturer’s instructions. With the right product and installation approach, a coated garage floor will be easier to clean, look better, and hold up to daily use for years to come.


