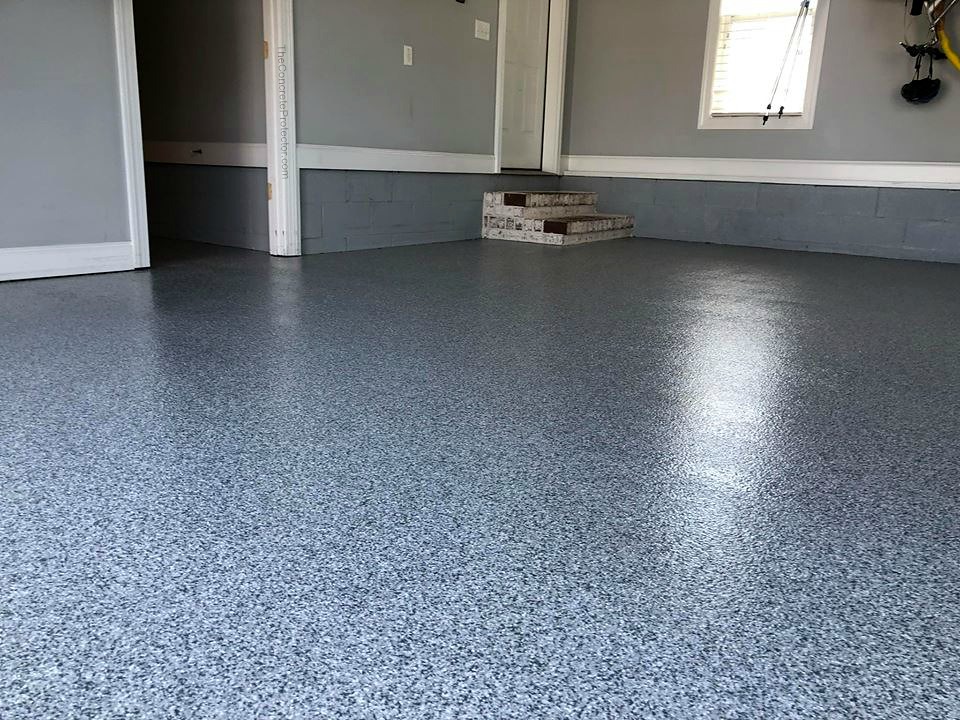
Garage Floor Coatings: Upgrade, Protect, and Beautify
Transform your garage from a plain concrete slab into a durable, attractive, and easy-to-maintain space with the right floor coating. Learn how epoxy and polyurethane systems protect against stains, chemicals, and wear, what the installation process involves, maintenance tips, and cost comparisons to help you choose the best option for your needs.

A garage is no longer just a place to park a vehicle; it can serve as a workshop, storage area, or an extension of your living space. A bare concrete floor is functional but often dull and vulnerable to stains, chemicals, and moisture. Applying a professional-grade garage floor coating protects the surface, simplifies cleaning, and dramatically improves appearance. This guide explains the advantages of coatings, compares epoxy and polyurethane options, walks through the installation process, outlines costs, and covers basic maintenance so you can decide with confidence.
Benefits of coating your garage floor
A coated garage floor offers practical and aesthetic advantages. The protective layer seals the concrete, preventing oil, gasoline, and chemical spills from soaking in and causing permanent stains. Coatings also guard against moisture intrusion, which can lead to cracking or spalling over time, and they reduce abrasion from foot and vehicle traffic.
Cleanup becomes far easier: dust, dirt, and spills can be swept or mopped away rather than scrubbed from a porous surface. In addition to protection, coatings transform the look of the space. A wide palette of colors, along with decorative flakes or metallic effects, can give your garage a clean, professional finish that complements your home and enhances curb appeal.
Finally, a properly installed system can extend the service life of the concrete, reducing long-term repair needs and adding perceived value to your property.
Comparing epoxy and polyurethane coatings
Two popular coating families dominate the market: epoxy and polyurethane. Both have strengths and suit different priorities.
Epoxy: Epoxy systems are known for their toughness and chemical resistance. When cured, epoxy forms a hard, glossy surface that holds up well to heavy loads, impacts, and frequent use. Epoxy accepts color pigments and decorative flakes easily, making it a favorite for homeowners who want a customized appearance. However, standard epoxy can yellow with prolonged UV exposure and may become brittle in areas with significant temperature swings.
Polyurethane: Polyurethane coatings are more flexible and provide excellent UV stability, so they resist yellowing and chalking when exposed to sunlight. They tend to be thinner than epoxy but offer superior abrasion resistance and better tolerance of temperature changes. Polyurethane is often used as a clear top coat over epoxy base layers to combine the adhesion and body of epoxy with the UV protection and durability of polyurethane.
Choosing between them depends on climate, sun exposure, expected traffic, and desired aesthetics. Many professional systems pair an epoxy base with a polyurethane topcoat to achieve the best of both worlds.
How a garage floor coating is applied
Proper surface preparation and application are crucial for a long-lasting result. While DIY kits exist, professional installation typically delivers a more consistent outcome. The standard process includes:
-
Surface preparation: The concrete is cleaned thoroughly—removing oil, grease, and dust—then mechanically abraded by grinding or shot-blasting to create a profile that promotes adhesion. This step is often the most important for ensuring the coating bonds well.
-
Repairs: Any cracks, spalls, or imperfections are filled and leveled so the surface is uniform.
-
Primer application: A primer or sealer is applied to lock in dust and enhance the bond between the concrete and the coating.
-
Base coat application: The main coating is spread, often in multiple layers, to build the desired thickness and strength. If decorative flakes are used, they are broadcast onto the wet base coat.
-
Decorative elements: Color chips or flakes are added while the base is still tacky to create texture and visual depth.
-
Top coat application: A clear top coat, often polyurethane, is applied to seal the system, add gloss, and increase abrasion and UV resistance.
Each step requires attention to temperature and humidity conditions, cure times, and manufacturer specifications to avoid adhesion failures or surface defects.
| Coating Type | DIY Cost (Materials Only) | Professional Installation |
|---|---|---|
| Epoxy | $200 - $600 | $1,500 - $3,000 |
| Polyurethane | $300 - $800 | $2,000 - $4,000 |
Prices and estimates are for reference only and may change; conduct independent research before making financial decisions.
Cost factors to consider
Total cost depends on the coating type, garage size, surface condition, decorative options, and labor. DIY projects reduce material costs but require skill, proper tools, and time; mistakes can shorten the life of the coating. Professional installers charge more but bring specialized equipment and expertise, which usually produces a longer-lasting result. Additional repairs, leveling, or moisture mitigation can increase the price.
Maintenance and expected lifespan
Caring for a coated floor is straightforward. Routine sweeping or dust mopping prevents abrasive grit from wearing the surface. For deeper cleaning, use a pH-neutral cleaner and avoid harsh solvents or acidic cleaners that can degrade the coating. Wipe up spills promptly to prevent any potential staining or chemical attack.
With correct installation and regular maintenance, high-quality coatings can last 10 to 15 years or longer. Systems that combine epoxy bases with polyurethane topcoats generally offer extended durability and better resistance to UV and abrasion.
A coated garage floor is an investment in function, longevity, and appearance. Whether you opt for an economical DIY epoxy kit or a professionally applied epoxy/polyurethane system, choosing the right materials and ensuring proper surface preparation will deliver a finished space that looks great and stands up to daily use for years to come.


