Upgrade Your Garage Floor: Complete Coating Guide 2025
Discover how garage floor coatings—from epoxy to polyaspartic—can transform your garage into a durable, easy-to-clean, and attractive space. This comprehensive guide covers types of coatings, installation steps, comparisons, maintenance tips, and what to consider when choosing the right finish for your budget and needs. Learn about durability, curing times, UV resistance, and DIY vs professional application to make an informed upgrade.

Why invest in a garage floor coating?
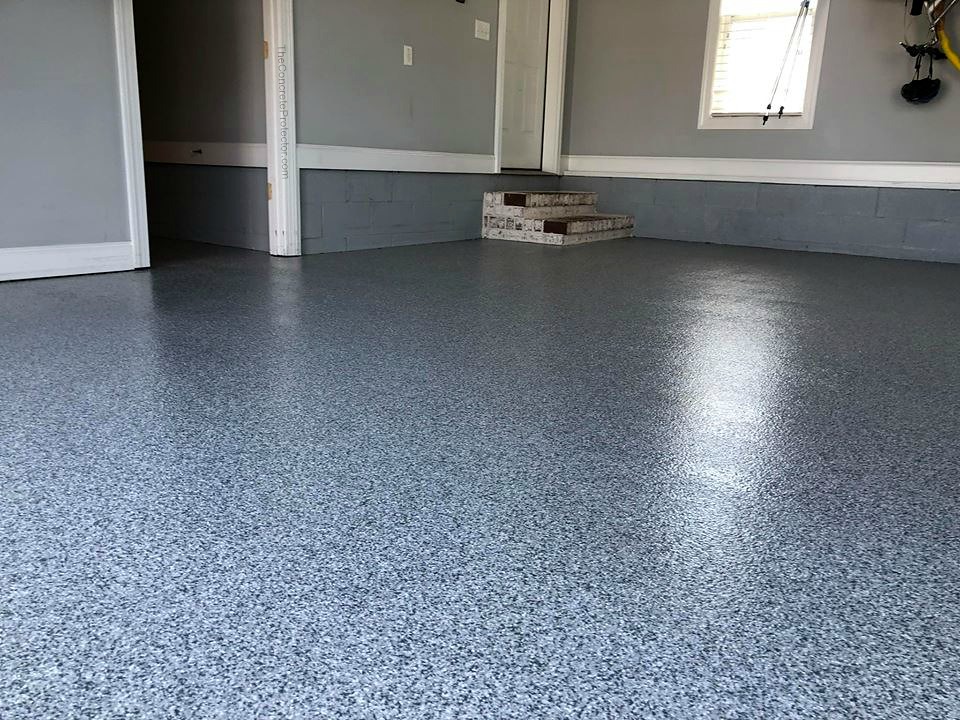
A coated garage floor does more than just look better. Applying a protective finish to concrete improves appearance, shields the surface from stains, and extends the life of the slab. A sealed floor resists oil, grease, household chemicals, and moisture that can otherwise lead to discoloration, mold growth, or spalling. Coatings also simplify cleaning—dust and spills wipe away more easily than they will on porous, bare concrete—and can increase curb appeal and perceived home value. Beyond looks, quality coatings add abrasion and chemical resistance that protect against everyday wear from cars, tools, and foot traffic.
Common garage floor coating types and what they offer
There are several widely used options, each with advantages depending on budget, intended use, and desired finish.
-
Epoxy coatings: A two-part resin system that chemically bonds to concrete. Epoxy is popular for its hardness, glossy finish, and wide color/customization options, including decorative flakes or metallic pigments. It provides strong protection but can be sensitive to UV exposure and temperature during installation.
-
Polyaspartic coatings: A modern alternative with very fast cure times and excellent UV stability. Polyaspartics tolerate a broader range of application temperatures and resist yellowing from sunlight, making them ideal for garages with direct sun exposure or when a quick turnaround is needed.
-
Acrylic sealers: The most budget-friendly choice, acrylics are simple to apply and dry quickly. They offer basic protection and a subtle sheen but generally require more frequent reapplication and don’t match the durability of epoxy or polyaspartic systems.
-
Polyurethane coatings: Frequently used as a clear topcoat over epoxy, polyurethane increases chemical and abrasion resistance and improves UV protection. It enhances longevity and maintains gloss.
How epoxy and polyaspartic coatings compare
| Feature | Epoxy Coating | Polyaspartic Coating |
|---|---|---|
| Durability | High | Very high |
| Curing Time | 24–72 hours | 2–4 hours |
| UV Resistance | Moderate | Excellent |
| Application Temperature Range | Narrower | Wider |
| Chemical Resistance | Good | Excellent |
| Cost | Moderate | Higher |
| DIY-Friendly | Possible with proper prep | Often best for professionals |
Prices, rates, or cost estimates mentioned in this article are based on the latest available information but may change over time. Independent research is advised before making financial decisions.
Typical installation steps
A successful coating job depends more on preparation than on the product itself. Common stages include:
-
Surface preparation: Remove oil, grease, and loose debris. Repair cracks or spalls and profile the concrete so the coating can adhere properly. Profiling is commonly done with acid etching or diamond grinding.
-
Priming: Some systems recommend or require a primer to improve adhesion and reduce the risk of bubbles caused by trapped air or outgassing from the concrete.
-
Base coat application: The main resin coat is spread using rollers or squeegees. For decorative systems, colored flakes or chips are broadcast into the wet base coat to add texture and visual interest.
-
Topcoat application: A clear topcoat—often polyurethane or a clear polyaspartic—is applied to lock in decorative elements, enhance chemical resistance, and add gloss and UV protection.
-
Curing: Allow sufficient cure time before returning vehicles or heavy items to the floor. Cure times vary widely by product; polyaspartics cure in hours while epoxy may require days.
Proper environmental conditions (temperature, humidity) during application are critical to avoid issues such as poor adhesion, bubbling, or an uneven finish.
Maintenance to keep your floor looking and performing well
Maintaining coated concrete is straightforward. Regularly sweep or use a dust mop to remove grit that can scratch the surface. Clean spills promptly with a soft cloth and use a pH-neutral cleaner for periodic mopping. Avoid harsh solvents and abrasive cleaning pads that can damage the coating. For stubborn stains, a soft-bristled brush and mild detergent usually work. Inspect the floor periodically for chips, delamination, or worn areas and address them quickly—spot repairs or re-topcoating can restore protection and extend service life.
Choosing between DIY and professional installation
Some epoxy kits are marketed to homeowners and can produce good results when surface preparation and application instructions are followed closely. However, coatings that cure quickly (like many polyaspartics) or require precise environmental control are often better left to experienced contractors. Professionals bring equipment for proper surface profiling, moisture testing, and application, which can be especially important on older or compromised concrete.
Final considerations
Select a coating system based on your priorities: longevity and chemical resistance favor polyaspartic or high-grade epoxy systems; lower upfront cost and simpler application may point you to acrylic sealers. Consider decorative options, expected traffic, UV exposure, and how quickly you want to use the space after installation. With careful product selection, proper installation, and routine maintenance, a garage floor coating can dramatically enhance the function and appearance of your garage while protecting the underlying concrete for years to come.


