Upgrade Your Garage with Durable Floor Coatings
A professionally applied garage floor coating does more than improve looks: it shields concrete from moisture, oil stains, and chemical damage while improving safety and resale value. Learn how epoxy, polyurethane, and polyaspartic systems compare, what installation involves, maintenance tips, design choices, and realistic costs to help you choose the right solution for your garage.

Benefits of Professional Garage Floor Coatings
A high-quality floor coating transforms a plain concrete slab into a long-lasting, low-maintenance surface. Beyond cosmetic appeal, these systems block moisture intrusion, resist oil and chemical spills, and reduce airborne concrete dust. Many coatings incorporate textured additives for enhanced slip resistance, improving safety in wet or oily conditions. When installed correctly, commercial-grade coatings can remain functional for a decade or more, cutting down on repair costs and keeping the space cleaner and more attractive for buyers should you decide to sell.
Surface Preparation and How Installation Works
Successful coating begins with careful preparation. Professionals start by cleaning the concrete to remove grease, dirt, and old sealers, then repair cracks and spalls so the new system adheres to a solid foundation. To create the right profile for bonding, contractors commonly use diamond grinding or shot blasting; these methods open the concrete’s pores and provide mechanical grip for the coating.
Installation usually follows a multi-step layering approach. A primer or moisture mitigation product is often applied first, especially on slabs with higher vapor drive. After priming, a base coat—typically a thicker epoxy, polyaspartic, or polyurethane resin—is rolled or squeegeed onto the surface. Decorative elements like colored flakes or metallic pigments can be broadcast into the base to add texture and visual interest. Finally, a clear topcoat seals the system, providing chemical resistance, UV stability, and additional abrasion protection. Professionals control cure times, ambient conditions, and layer thickness to ensure consistent performance.
Caring for Your Coated Floor
Maintenance is straightforward and mostly preventative. Sweep regularly to remove grit that can scratch the surface, and mop periodically with a pH-neutral cleaner for a deeper clean. Address spills promptly—most coatings resist common automotive fluids and household chemicals, but long exposure can still stain or degrade the finish. Avoid using harsh solvents or abrasive scrubbing tools, and lift heavy equipment rather than dragging it to prevent gouges. With routine care, professionally installed floors often deliver many years of reliable service.
Color, Texture, and Design Choices
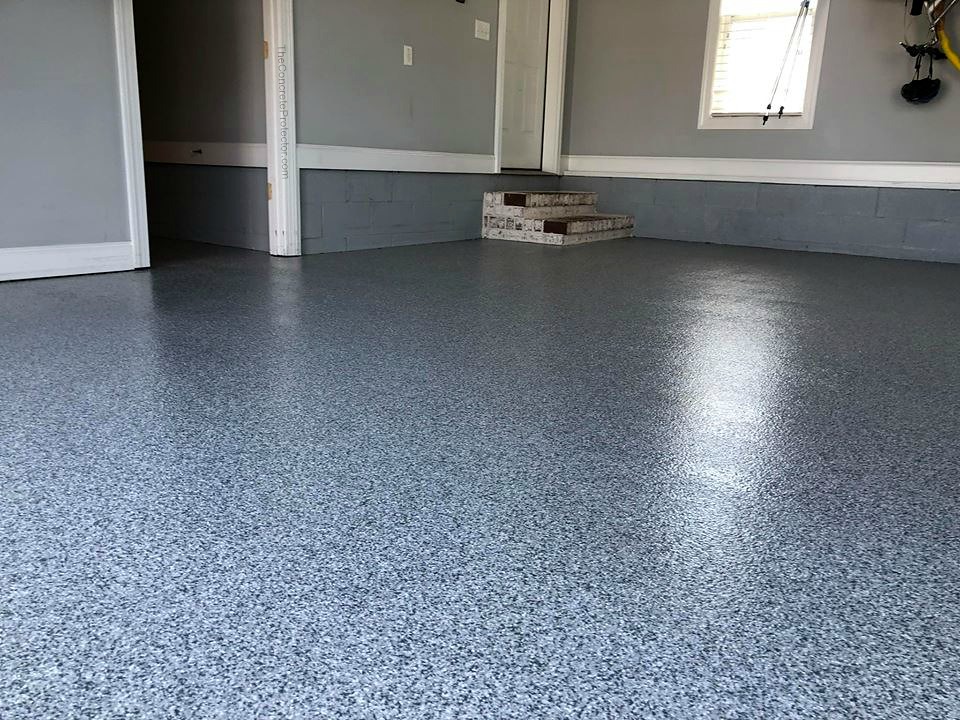
Modern coating systems offer plenty of customization, so you can match the floor to your garage’s function and your personal style. Solid-color finishes create a sleek, uniform look, while decorative flakes add color, hide imperfections, and increase slip resistance. Metallic and pearlescent topcoats produce a high-end, showroom appearance, reflecting light to brighten the space. Popular palettes include neutral grays and earth tones that disguise dirt, alongside bolder blues for a unique accent. Mix-and-match approaches—such as painted lines, borders, or logos—allow you to define work zones or enhance visual appeal.
Cost and Provider Comparison
| Coating Type | Average Cost (per sq ft) | Professional Installation | DIY Kit Cost |
|---|---|---|---|
| Epoxy | $3–$7 | $1,500–$3,000 | $200–$600 |
| Polyurethane | $4–$8 | $2,000–$3,500 | $300–$800 |
| Polyaspartic | $5–$9 | $2,500–$4,000 | Not recommended |
Prices, rates, or cost estimates mentioned in this article are based on the latest available information but may change over time. Independent research is advised before making financial decisions.
Longevity and Performance Factors
How long a coated floor lasts depends on several variables: the quality of the substrate preparation and installation, the coating chemistry, how the garage is used, and the environmental conditions it faces. Professionally applied systems, when matched to the workload and installed correctly, commonly last between 10 and 20 years. DIY applications can save money up front but often show wear sooner—many DIY coatings need replacement or touch-ups within 3 to 5 years. Exposure to extreme temperatures, direct sunlight through garage doors with glass, and heavy industrial use will shorten lifespan unless the system is specifically formulated for those demands.
Choosing Between DIY and Professional Installation
If budget is the primary concern and the garage sees light use, a well-reviewed DIY kit might be acceptable. However, achieving a durable, long-lasting finish requires proper surface profiling, accurate mixing ratios, and careful climate control during application—steps that are easier to guarantee with an experienced installer. Pros bring the right tools, materials, and know-how to address issues like moisture vapor emission, complex repairs, or large surface areas efficiently. For high-traffic garages, commercial vehicles, or when resale value matters, professional installation is usually the smarter investment.
A professionally installed floor coating is more than an aesthetic upgrade; it’s a practical enhancement that shields concrete, improves safety, and can increase your home’s marketability. By weighing the various coating chemistries, preparing the slab correctly, and following straightforward maintenance practices, you can select a solution that balances cost, longevity, and appearance for your specific needs.


